How to Can Peaches and Other Fruit (With or Without Sugar)
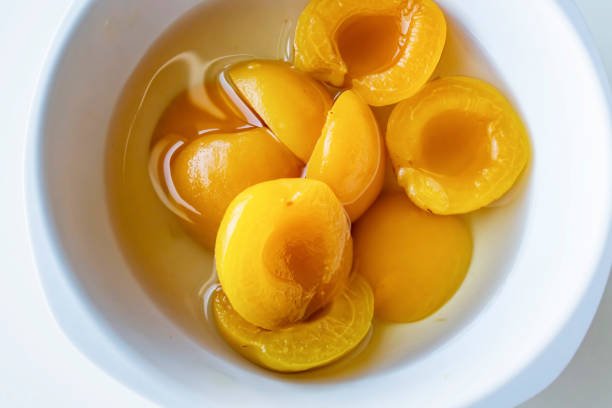
I’ve chosen peaches as the example fruit for these instructions since they are the fruit most associated with the process of canning. Peaches that have been home-canned not only look lovely in the jars in which they are stored, but they can also be used in a wide variety of dishes, from fruit salad to quick pieces of bread.
However, the process of canning that is being described here is applicable to a variety of different fruits.
Peaches and other fruits may be preserved in a safe manner by using either the hot pack or the raw pack method. I am not a fan of the raw pack technique since it nearly always results in fruit float, which is when the fruit floats up out of the liquid that it is canned in.
This is not a desirable outcome, and it is one of the reasons why I avoid using the raw pack method. The uncooked fruit in the pack that rises to the surface has an unpleasant brownish tint.
When using the hot pack approach, the risk of anything like that occurring is much reduced.
Before beginning the canning process, carefully inspect the peaches
and choose only those that are free of any bruises or other imperfections (use imperfect fruit for chopped recipes such as chutney).
If the peaches are underripe, they will have a better texture after they are canned, but the taste will be excellent if they are ripe: Find a happy medium by selecting peaches that are fragrant but yet have some bite to them.
If you want to can peach halves rather than chunks or slices, you should choose a freestone kind of peach rather than a clingstone variety. Clingstone peaches are difficult to remove from their pits in order to create tidy halves, while freestone peaches are much easier to do so.
Prepare your container to hold the boiling water.
Separate from your boiling water bath, bring a big pot of water to a boil over high heat in a separate cooking vessel. To properly preserve freestone peach halves for canning, first cut the peaches in half lengthwise, then twist each half counterclockwise to remove the pit.
If you are using clingstone peaches, you should make a little x on one end of each peach. Put the peaches into the water that is already boiling for ten seconds. This process not only makes it simpler to peel the peaches but also stops the fruit from becoming brown once it has been peeled.
Place the peaches that have been blanched in a strainer and allow them to drain.
When the peaches are cold enough to handle, peel them. You may also use a spoon to scrape away the darker regions that were previously occupied by the pits, although this step is optional.
Cut the peaches into slices or pieces, according to your preference.
When dealing with clingstone peaches, it is much simpler to chop the sections directly off the pits rather than attempting to first remove the pits. This is because the pits tend to stick to the flesh of the peach.
Until quite recently, peaches were often preserved by canning them in a basic sugar syrup that consisted of sugar and water in equal amounts, or occasionally twice as much sugar as water.
Canning peaches and other fruits in unsweetened juice makes more sense in today’s more health-conscious times, despite the fact that it is still technically viable to do so.
You could also use regular water, but I find that when I do so, part of the taste of the fruit is lost in the water, which results in a product that is not very flavorful when it is finished.
Because of its mild taste and clear appearance, white grape juice is my go-to choice when it comes to selecting a juice to use when preserving fruit.
Bring to a boil the canning liquid of your choosing, whether it be sugar syrup, juice, or water. After adding the peaches that have been peeled and sliced, cook them for two minutes.
boil. After adding the peaches that have been peeled and sliced, cook them for two minutes.
Using a slotted spoon, carefully transfer the peaches to sterilized and hot canning jars. However, ensure that there is a headspace of at least a quarter of an inch between the surface of the fruit and the tops of the jars before packing the fruit in securely.
On top of the fruit, pour the hot liquid in which the peaches were simmered. The peaches must be submerged in the liquid, but there must be at least a half-inch of head space remaining. Applying little pressure with the back of a spoon to the fruit can help eliminate any trapped air bubbles.
Use a clean cloth to wipe the rims of the jars, and then screw the canning lids on tightly.
In a water bath at boiling temperature, the peach jars should be processed for 20 minutes for pints and 25 minutes for quarts. If required, adjust the canning time to account for your location’s altitude.
How to Canning Berries with No Other Ingredients, Including Blueberries and Other Berries
This delightfully simple method calls for just one component, which is blueberries. The end product has a smoother consistency but retains all of the taste of the fresh fruit that was used. In addition to juneberries, blackberries, raspberries, wineberries, currants, and gooseberries, you may use this procedure to process currants.
Start by bringing a kettle of water to a rolling boil.
While you wait for the water to boil, you should go over the blueberries and remove any that are shriveled or not quite ripe from the batch.
After washing the fruit, place it in a colander and allow it to drain for a minute or two.
When working with the blueberries, start with roughly a pint at a time.
Wrap a single piece of cheesecloth around the blueberries, and then tie them up into a loose bundle. The cheesecloth has to be knotted firmly, but the blueberries shouldn’t be packed in too closely; you want water to be able to move freely among the berries.
Using a pair of tongs, secure yourself to the end of the cheesecloth bundle where the knot is.
After placing the blueberries in the boiling water, gently agitate the bundle while it is submerged in the liquid. Keep going like this for the next thirty seconds. At the conclusion of the thirty seconds, you should see that the cheesecloth has picked up a few juice stains here and there.
Remove the knots from the cheesecloth; you may use it again for the next pint of blueberries if you choose.
Place the blanched blueberries in a sterile canning jar and transfer them to the jar when you have finished blanching them. Leave a head gap of half an inch. This is an uncommon procedure since it does not involve the addition of any liquid, not even water.
Turn the canning lid clockwise to secure it. It is necessary to repeat the process of blanching the remaining blueberries and filling the jars with them.
processing processes with the remaining blueberries, including blanching and filling the jars.
Place blueberries that have been blanched in jars and process them in a water bath at boiling temperature for 15 minutes for pints and 20 minutes for quarts. If required, adjust the timeframes for processing based on your location’s altitude.
Fermented Hot Chile Pepper Sauce
HOW TO USE LACTO-FERMENTED VEGETABLES IN FIVE DELICIOUS WAYS